
Doobert Chatbot
Respond Faster, Serve Smarter
AI that optimizes YOUR programs and
enhances YOUR support!
Your organization’s personal resource to assist and engage with your audience. No more sitting on your computer feeling overwhelmed with this tool that works 24/7 for YOUR organization.
The chatbot is completely FREE for animal welfare organizations, providing an easy way to engage and connect with YOUR community. For added benefits, premium features such as multilingual communication and monthly user engagement reports are available, helping organizations expand their reach and strengthen connections with supporters.
Fully Customizable
Personalize the Doobert Chatbot to YOUR website with just a few steps.

Universally Compatible
Can work on any website, with a Word Press specific Plug-In offered.

Multilingual Capabilities
Break language barriers and engage with YOUR community in their language.
PetCo Love Lost Feature
Your community can use this tool to help reunite lost pets with their owners right in your area.

Advanced Analytics
Optimize communication by learning how YOUR supporters interact with your website!
Adopt-A-Pet Feature
A tool to connect and help match adoptable pets with loving homes.
Reviews
How to Get Started
To begin using the Doobert Chatbot, you need to first sign-up as an organization on Doobert. By creating an account, you’ll gain access to a suite of powerful tools designed to enhance user engagement, streamline communication, and support your organization’s mission.
Sign up here to create your account. Please note that it can take upwards of 24-48 hours to be approved for an account by our team at Doobert.
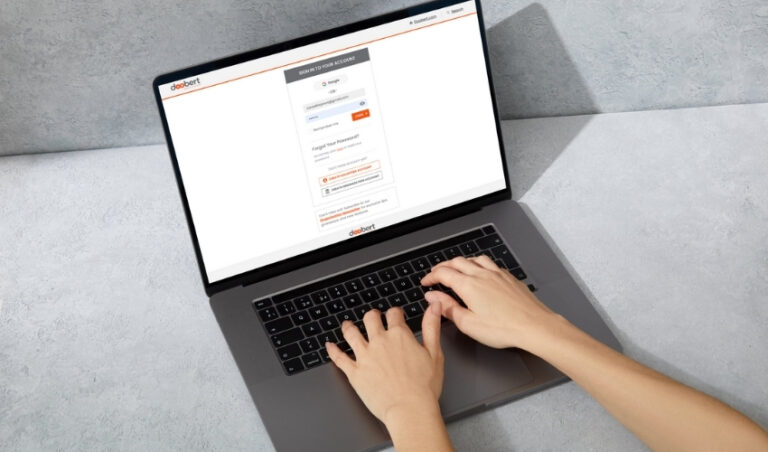
Step 1: Log in or Sign Up
Log in to your Doobert Organization account. If you don’t have one yet, sign up and create one.

Step 2: Navigate to the Chatbot Plugin
In your organization dashboard, go to Chatbot Plugin < Chatbot Dashboard in the left menu.
If you cannot find the Chatbot Plugin icon on the left panel menu, click Edit Menu at the bottom of the left panel. A pop-up should show up where you can select Chatbot Plugin option.
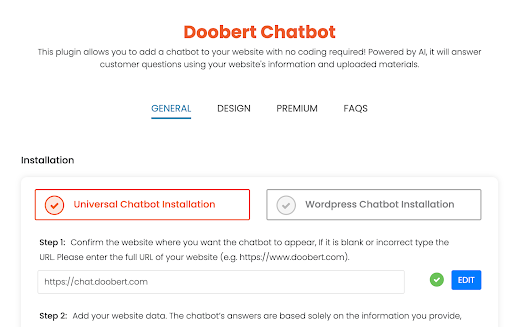
Step 3: Follow the Step-by-Step Installation Guide
You will be redirected to the General page of the chatbot dashboard. Follow the steps indicated under the Universal Chatbot Installation tab. Note that you cannot skip to the next step without completing the previous step.

Step 4: Verify Your Website URL
Verify your website URL. If you already have a website URL in your Doobert Account Profile, the website field will show it. But if there isn’t one, you can just type it in.
After you click confirm, you will be notified if the verification is successful.
Step 5: Add Your Data Sources
Add the data you want the chatbot to use as a reference. By default, the system will pull if there are available sitemap URLs.
If there isn’t, you can type them in or select Web URL and add all your relevant website links in the field. If you are unsure how to get your website’s Sitemap URL, here are different ways to retrieve it.
Once you click Add Data, the system will process everything depending on the number of links you added. It might take a few minutes but you will see the status once it is completed.


Step 6: Install the Chatbot on Your Website
Once you have successfully updated your data, you can copy the Installation Script.
Depending on your website, paste the script before the closing tag of the site footer. Once you save it, the chatbot widget will appear.
You can then proceed to update the design and other settings to your preferences.
Step 1: Log in or Sign Up
Access your Doobert Organization account to begin. Don’t have one yet? Sign up and create your profile.


Step 2: Copy Your Personalized API Key
Access your personalized API Key in the “Chatbot Plugin” section of your Doobert organization account. This key provides plugin access and is always available in your account.
Step 3: Activate the Plugin
In your WordPress Admin Dashboard, search for “Doobert Chatbot” under “Add New Plugin” and click “Install Now.” Once installed, activate the plugin and enter your authorization code to access the settings.

Step 4: Customize and Configure
Once fully installed and activated, the Chatbot can be fully personalized to your organization’s brand and preferences. From colors to language, this Chatbot is an extension of your team, supporting your mission.
How To Unlock Premium Features?
1. In your Doobert Organization Dashboard, go to Chatbot Plugin < Upgrade to Premium in the left menu.
2. Select the premium plan and click on Stripe Checkout. Fill in the payment details.
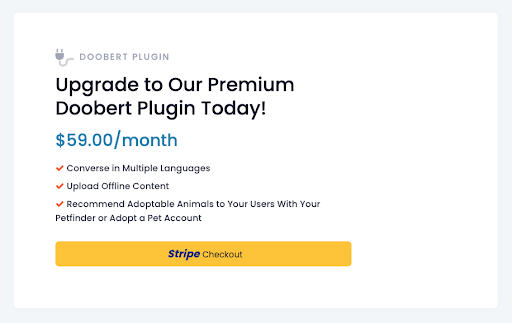
3. Once the upgrade is successful, the Premium tab will appear in the Chatbot Dashboard, and you can enable and modify settings to your preferences.
Support
For more detailed information about setting up and using the Doobert Chatbot,
please visit our FAQ page or view Your Ultimate Guide to Installing the Doobert Chatbot video.
If you need further assistance or have specific inquiries, don’t hesitate to contact us at help@doobert.com.